
Understanding your website’s traffic is crucial for business owners or marketers. Google Analytics is a powerful tool developed by Google that provides detailed insights into user behavior on your website. It helps you track where your website traffic is coming from, how long visitors stay, and whether they’re engaging with your content. You can also identify which marketing channels are driving the most traffic and conversions, whether it’s through Google organic search, paid ads, social media, or email campaigns.
In July 2023, Google shifted from the old version of Google Analytics (Universal Analytics) to GA4, which is the newer setup. Want to set up GA4 for your website?
Here’s a simple guide to help you get started with Google Analytics GA4 for your website.
Steps for Setting up Google Analytics 4
STEP 1
Go to https://analytics.google.com/analytics/ and login with your Gmail id
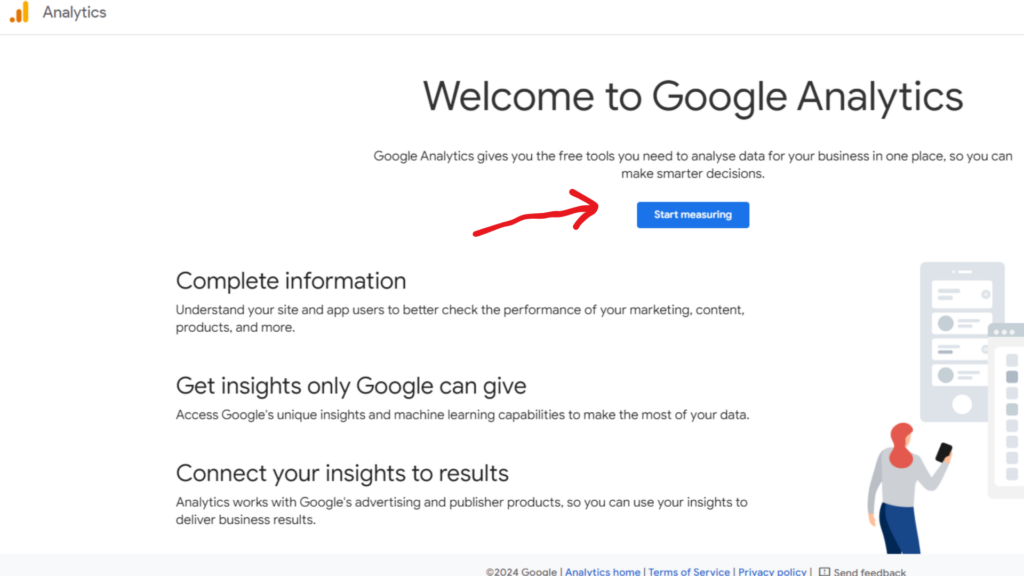
STEP 2
Click on “Start Measuring” Button
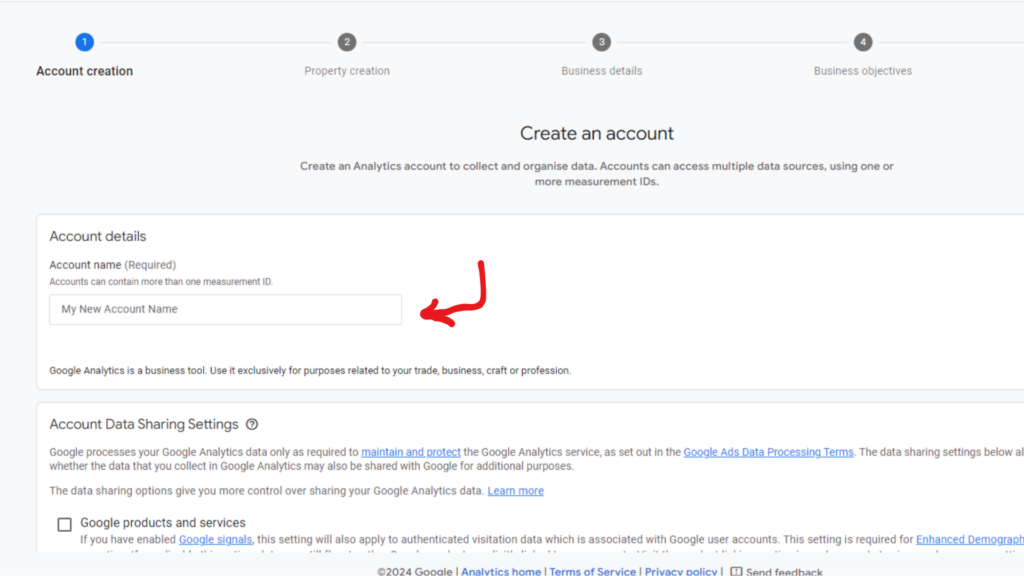
STEP 3
Provide the name of your account as mentioned here (Usually a company name).
Click “Next” after providing the company name.
STEP 4
Provide a “Property Name” here (usually same as Account Name), and select “Reporting Time Zone” and “Currency”.
Click “Next” after selecting the appropriate option.

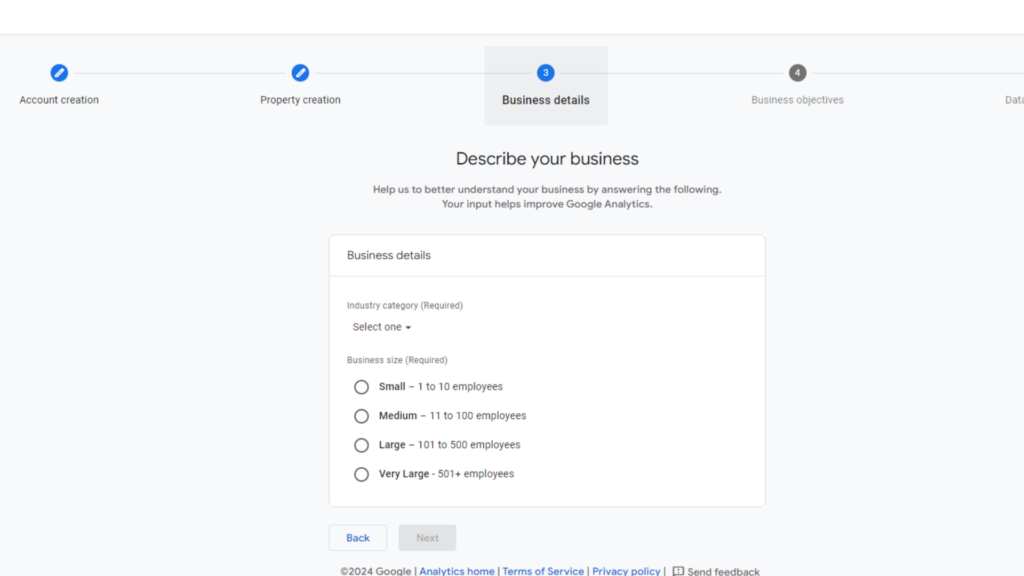
STEP 5
Provide the details “About Your Business” by selecting the option relevant to your business, such as industry category, business size, and how you intend to use Google Analytics for your business.
Click “Next” after selecting the appropriate option.
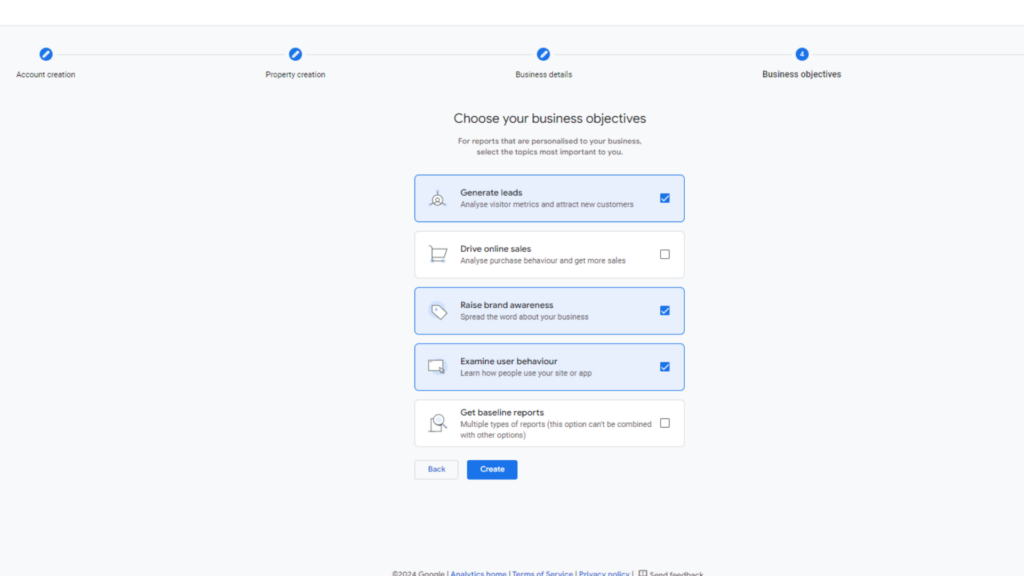
STEP 6
Choose your goal from the options given and then click on “Create button”
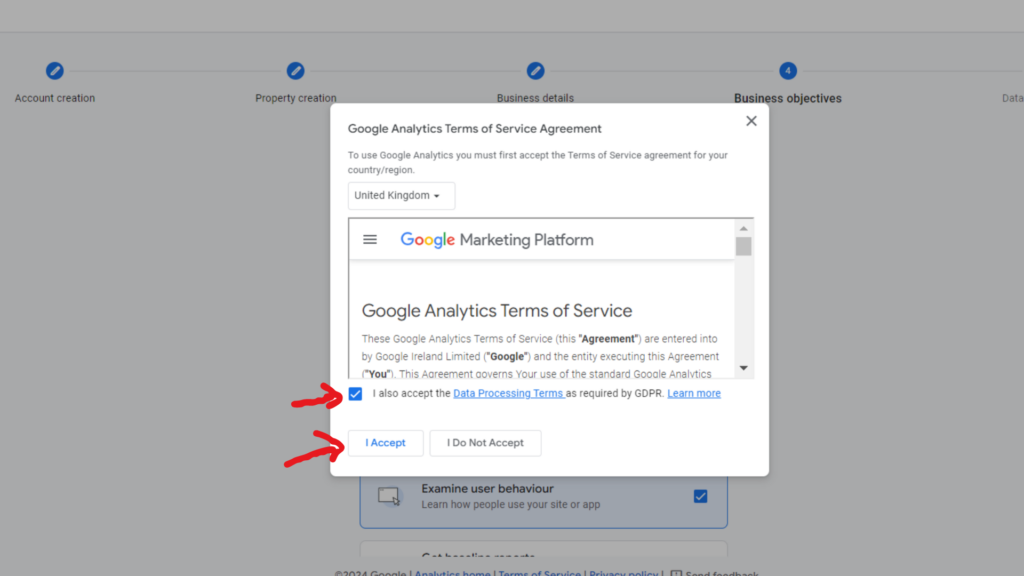
STEP 7
Check the relevant boxes to accept the Data Processing Terms as required by GDPR and the Measurement Controller–Controller Data Protection Terms of the data.
Now Click “I Accept”.
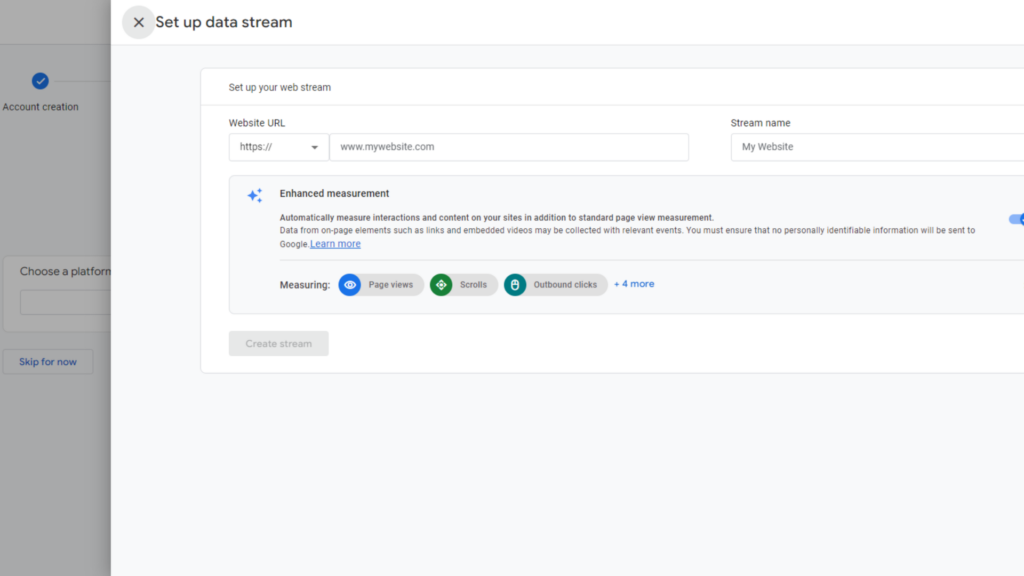
STEP 8
Accepting the terms will land you on the “Web Stream Details” screen, where you can click on the web.
Now Click “Create Stream”.
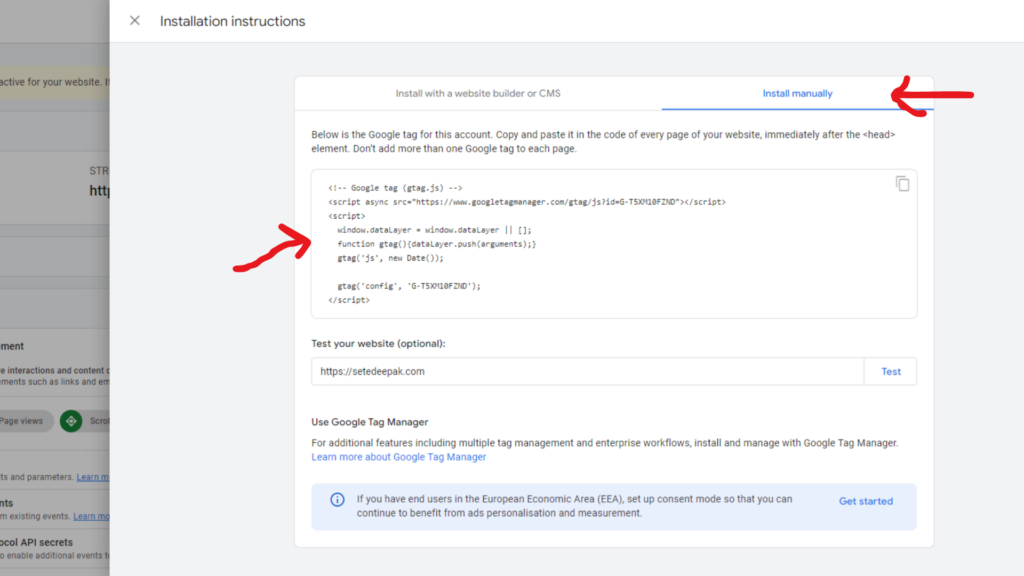
STEP 9
To get the Google Analytics code click on – Install Manually. Copy the code and paste it into the code of every page of your website, immediately after the <head> element.
Incase you do not know how to add code on websites’ backend you may seek help from your website developer or tech team.
Congrats!!! You have successfully created Google Analytics 4 Property!
Want an expert to setup your GA4?
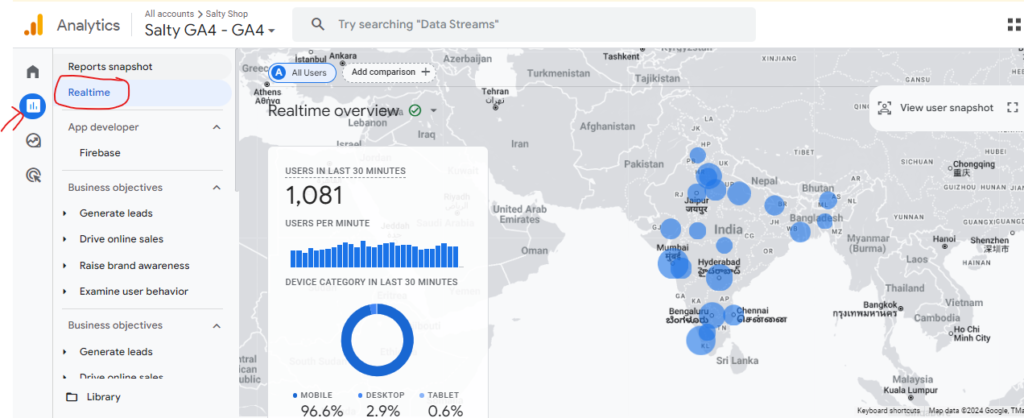
How to Check if My Google Analytics Account is Tracking Traffic Data?
Once you’ve set up your Google Analytics property, the next step is to make sure it’s tracking data correctly. Here’s a simple way to check:
- Open your Google Analytics account.
- In the left menu bar, click on “Reports.”
- Then, navigate to the “Realtime” report.
Now, go to your website using a different browser or device. Navigate around your site for a minute or two.Back in your Google Analytics dashboard, under the Realtime report, you should see at least one active user. If you see this, it means that Google Analytics is properly tracking data from your website in real-time.
This real-time check is a great way to confirm that everything is set up and working as expected with your Google Analytics account.
Learn to Share your Google Analytics Access
Sharing Google Analytics access with your team or colleagues can be useful for collaboration.
To give a new user access to your Google Analytics, follow the below steps.
STEP 1
Login to your Google Analytics account
STEP 2
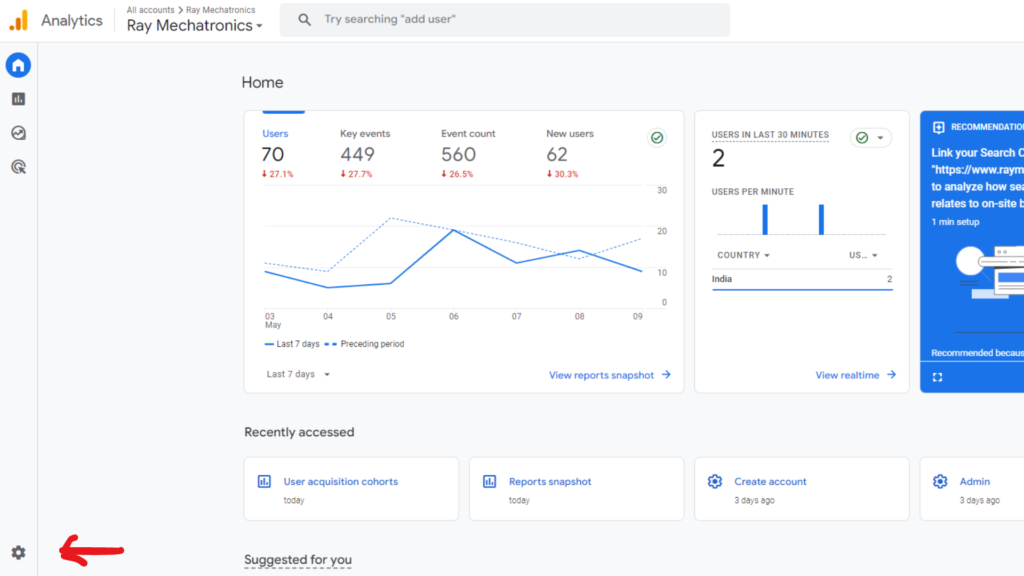
Click on “Admin” in the bottom left-hand corner
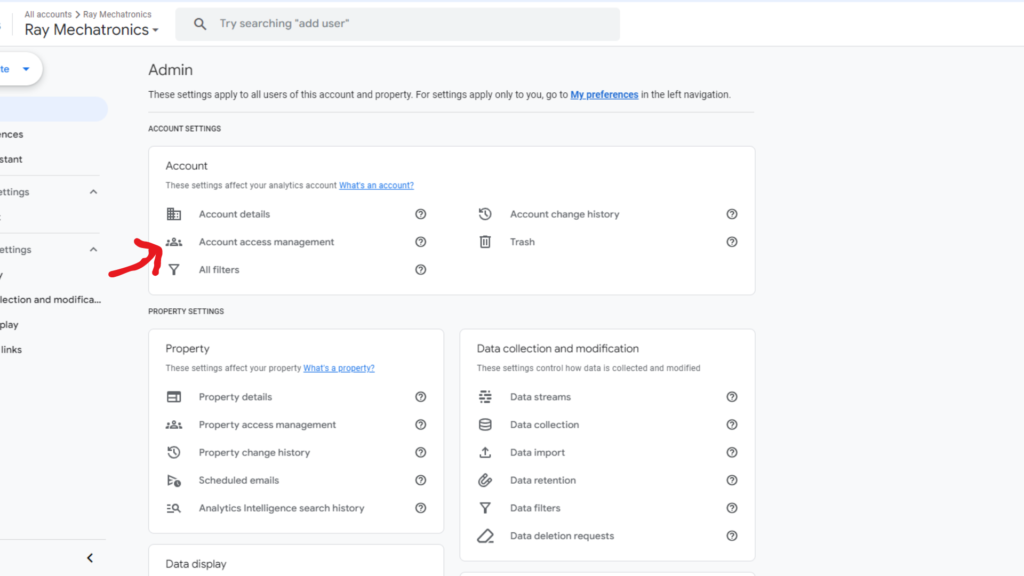
STEP 3
Click “Account Access Management”
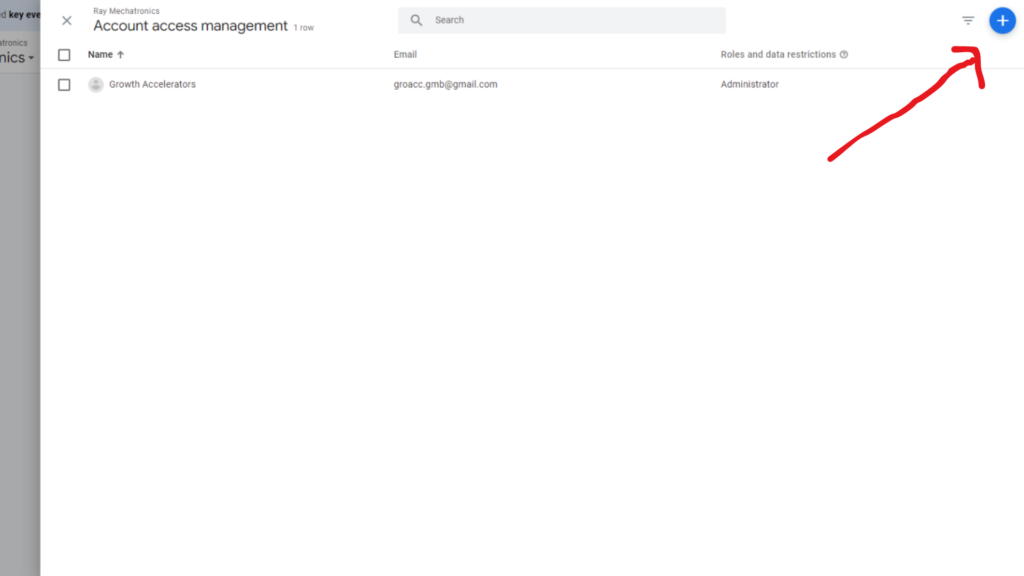
STEP 4
Click the Blue + symbol in the top right corner and select “Add Users”
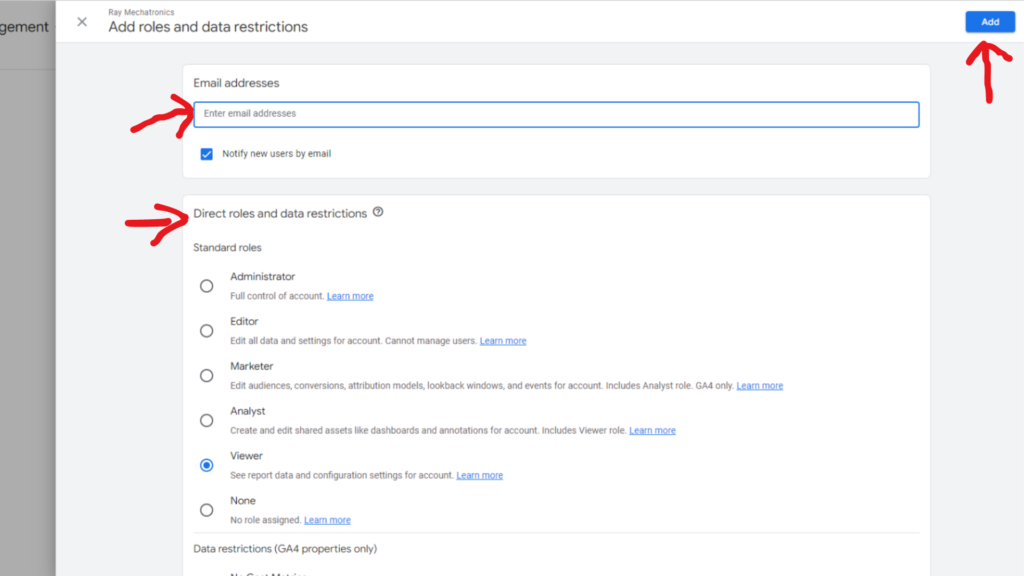
STEP 5
Enter the email address you wish to give the access of your GA property. Select the level of access
Click “Add” in the top right-hand corner.
By following these steps, you can easily share access to your Google Analytics account with your team or counterparts, allowing them to view and analyse the data as per their assigned permissions. This promotes collaboration and helps in optimising your website’s performance based on collective insights.
Summing up
GA4 is an essential tool for understanding website performance and optimising it to enhance user experience. At Growth Accelerators, we specialize in setting up and leveraging GA data to boost our clients’ SEO performance, improve their conversion rate on the website and above all help create seamless user experience.
Finding GA4 reporting hard?


